Some of the links are affiliate links and I earn commission from them. Moreover, as an Amazon Associate, I earn from qualifying purchases.
Django is a popular Python web framework, that helps in creating complex and dynamic websites that can handle millions of traffic. Additionally, this has a lot of predefined libraries which makes website creation faster. DigitalOcean is one of the top choices of web developers when it comes to hosting a Django web app.
On, top of it, you can use an Openlitespeed web server and enable a caching feature that loads websites in microseconds. In this post, let’s see how to host a Django web app in DigitalOcean droplets with OpenLitespeed cache.
How To Create WordPress Website.
Host Django WebApp in shared hosting.
Create a DigitalOcean Droplet With Django and OpenLiteSpeed Web Server
In this post, we will use a special trick, so that the creation of a container happens along with Django installation and OpenliteSpeed web server. But, first, click on the button below to create an account with 200$ free credit. Yes, you can use these credits for two months with no charges at all.
Once you create an account, log in and click on the Projects option, and then on first-projects. Now, at the top, you should find an option called Create. Select the drop-down and click on Droplets. Droplets are nothing but a server, that provides compute resources and storage for your web apps.
Choose Region and DataCenter
Select a region and data center. You should always select regions and data centers which are nearer to your business location, or nearer to your target audience.
Choose an Image from Marketplace
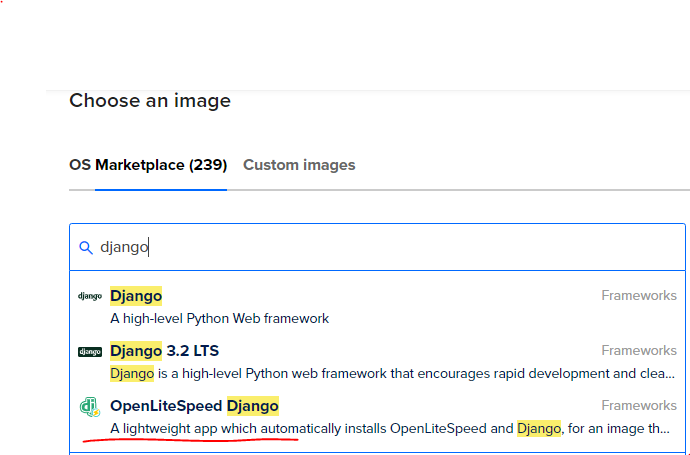
The second step is important because half of the work will be done based on our selection. First, select MarketPlaces and type the keyword “Django”. Select the third one that says, Django OpenLiteSpeed Web Server.

Choose Size
Choosing size will basically define your resources like CPU and RAM. A higher value means, a higher price, hence choosing the values, based on budget and expected traffic to your website. You can always change the size later, but you have to bring your websites down before you do that. Hence, selecting a higher plan from the beginning is a good option.
Choose Authentication Method
Authentication methods are the ways to log in to your droplets. The simplest and default way to choose password authentication, which allows you to connect to your droplets via SSH or putty. By, default the user name is root and the password is the one, that you type in the password field. Make sure, you type a strong password.
Create Droplet In Digital Ocean
Once, you type or select all compulsory options, at the bottom, you will get Create droplet option. Click on it and the droplet creation will start. It will take around 10 to 15 minutes as it will install the necessary software along with Python, Django library, and OpenLiteSpeed Web Server.
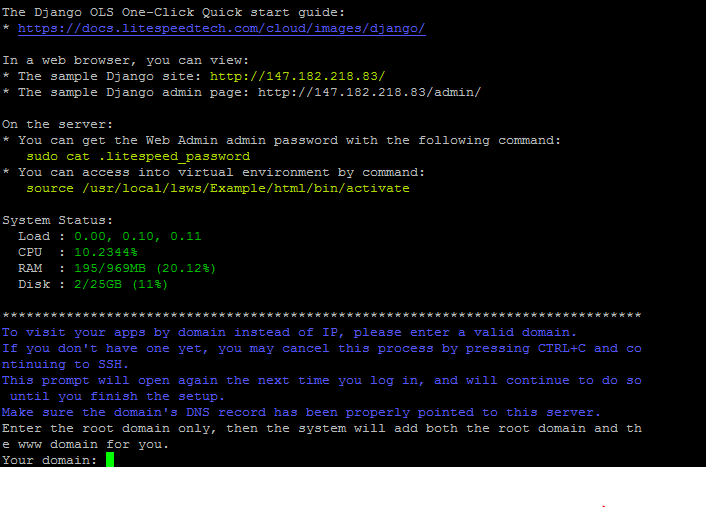
You can monitor the progress and once it completes you should be able to see a public IP. Copy the IP and Open it in putty. Type the username and password. Your, putty session must look like this, If it is showing differently, then close it and open it again after some time, because the installation process still might be running in the backend.

Configure OpenLiteSpeed WebServer
Before we install the Django web app in the digital ocean’s droplet, a few steps need to be completed. It’s very easy to follow. On the putty session, you should follow the interactive windows. Just fill in the information correctly.
Provide Domain Name
Make sure you provide the domain name which is already present in the digital ocean domain name. If you are using any external domain provider, first point your domain name to the digital ocean name server and then follow the below steps.
Please input a valid domain:
Please verify it is correct. [y/N]
Install Free SSL
DigitalOcean provides you free LetsEnrypt SSL, hence, you do not have to spend any extra amount on it. Just, type yes, your email address, and then after verifying the information, type “y” again.
Do you wish to issue a Let’s encrypt certificate for this domain? [y/N]
Please enter your E-mail:
Please verify it is correct: [y/N]
You can force HTTPS rules to be applied, which will route your traffic from HTTP to the HTTPS version.
Do you wish to force HTTPS rewrite rule for this domain? [y/N]
Complete the process by pressing Y:
Do you wish to update the system which include the web server? [Y/n]
You should not be prompted to initiate this setup again.
Set Up Django Web App In DigitalOcean Droplet
Now, it’s time to set up your Django application on DigitalOcean Droplet. Make sure you have tested your Django WebApp locally. As Django development is out of this post’s scope, we will cover this topic. We already have a sample Django web app on GitHub, which we are going to use in this tutorial.
Please access the virtual environment first.
source /usr/local/lsws/Example/html/bin/activate
cd /usr/local/lsws/Example/html/
Paste your Django Project on this folder, or pull your git repository by executing the below command.
git clone git@github.com:atish9937/demodjango.git
You can also execute all Django setup-related commands as below
pip install -r requirements.txt
python manage.py migrate
python manage.py createsuperuser
Configure OpenLiteSpeed GUI DigitalOcean
OpenLiteSpeed GUI will give you a lot of options related to web servers including setting up multiple web hosts and cache features. Hence, it is good to have the GUI. You just need to allow port 7080 on the firewall by using the below command.
ufw allow 7080
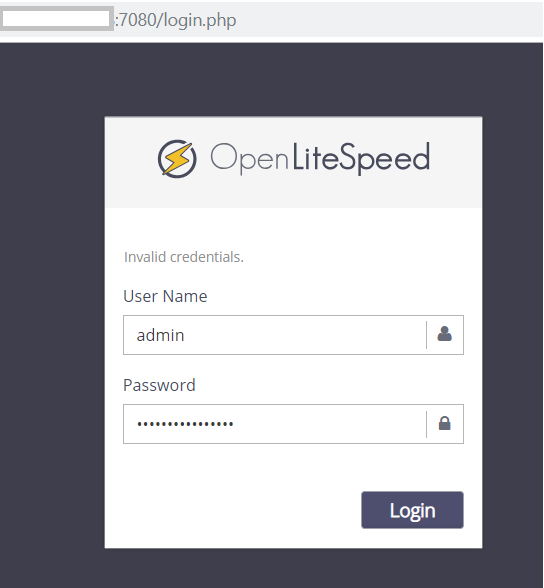
You should be able to log in to OpenLiteSpeed Admin GUI using the URL https://droplet_ip_address:7080. The username is admin and you can get the password from the below command.
cat /root/.litespeed_password

Host Django WebApp On DigitalOcean With OpenLiteSpeed
At this point o time, if you open the hostname or IP address of your site, it will point to a demo website. You must point your Django files to a web host. To do so, open LiteSpeed GUI and go to Web Admin > Virtual Hosts > Context
Click on Example and you will see various options below. Replace the word “demo” with the folder name of your Django project/
- Type =
App Server - URI =
/ - Location =
/usr/local/lsws/Example/html/djangoprojectfoldername/ - Binary Path =
/usr/local/lsws/fcgi-bin/lswsgi - Application Type =
WSGI - Startup File =
djangoprojectfoldername/wsgi.py - Environment =
PYTHONPATH=/usr/local/lsws/Example/html/lib/python3.8:/usr/local/lsws/Example/html/djangoprojectfoldername - Environment =
LS_PYTHONBIN=/usr/local/lsws/Example/html/bin/python
Now, modify the ownership of your Django files by using the below command
chown -R nobody:nogroup /djangoprojectfoldername
Once you do that, reboot your server once and then try accessing the website. It should point to your Django web app.
Enable OpenLiteSpeed Cache Django WebApp
The final step is to enable the cache for your Django web app. It is very simple, We can put the following example rules to the OLS Web Admin > Virtual Hosts > Context > App Server context > Rewrite Rules:
CacheLookup on
RewriteCond %{ORG_REQ_URI} !/admin/
RewriteRule .* - [E=cache-control:max-age=120]
And with that, you have just enabled caching on your site. All pages that are not in the admin subdirectory, will be cached publicly for two minutes.
Conclusion
After, completing all the steps above, we have completed the hosting of Django WebApp on DigitalOcean Droplet with OpenLiteSpeed web server. On top of it, we have also enabled caching feature to make the website load faster. Feel free to comment if you have any questions or suggestions.